โจทย์ของวันนี้คือ พบเหตุการณ์ไม่คาดคิด ที่ทำให้ระบบเครือข่าย Access Point แบบ point to point ล่ม เช่น เครื่องพัง เสาล้ม สายขาด เป็นต้น แต่ว่า Site ดังกล่าวมี Internet สำรองอยู่แล้ว เราจะใช้วิธีการเชื่อมต่อผ่าน VPN เพื่อใช้งานเครือข่าย โดยการตั้งค่าดังนี้
การตั้งค่าบน Endian Server
Enable VPN Server
เปิดการใช้งาน OpenVPN บน Endian โดยการ [/] และในส่วนของ Dynamic IP pool ใส่ Network IP ที่เราจะใช้งานกับ VPN ที่จะเข้ามา Connect ให้เป็น class เดียวกับ local ที่เราใช้งานอยู่

Create Account
สร้างผู้ใช้ โดยหากต้องการแค่ให้ connect เข้ามาใช้ทรัพยากรได้เฉยๆ ก็ไม่ต้องเลือก Direct all client traffic … มันจะเปลืองเน็ตของ local เปล่าๆ

Advance Settings
เลือก [/] block DHCP, [/] Don’t block traffic between clients ส่วน allow multiple ตรงนี้ไม่ค่อยแนะนำ อยากให้แยกเครื่องใครเครื่องมันดีกว่า

Download CA certificate
ส่วนนี้ต้อง download ไปเพื่อใช้งานในการตั้งค่าเครื่อง client

การตั้งค่าเครื่อง Client
Download OpenVPN
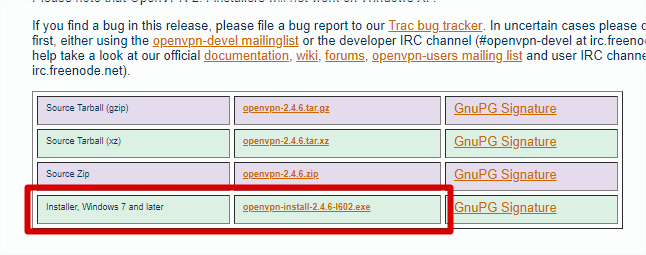
เข้าไปที่ https://openvpn.net/index.php/download/community-downloads.html แล้ว download ตัวที่เป็น .exe มาติดตั้ง
ขั้นตอนติดตั้งแบบเร็วๆ คือ Next ไปเรื่อยๆ


กด Install TAP-Windows

การตั้งค่า
เปิดเข้าไปที่ %PROGRAMFILES%\OpenVPN\sample-config จะมีไฟล์อยู่ 3 ไฟล์ ให้เปิด client.ovpn ด้วย editor อะไรก็ได้ เช่น notepad แต่ถ้าให้อ่านง่าย ผมแนะนำให้ใช้พวก VScode หรือ sublinetext ก็ดีกว่า

รายละเอียดของไฟล์ที่เราต้องแก้ไข

บรรทัดที่แก้ไข มีดังนี้
# Use the same setting as you are using on
# the server.
# On most systems, the VPN will not function
# unless you partially or fully disable
# the firewall for the TUN/TAP interface.
dev tap
; dev tun

# The hostname/IP and port of the server.
# You can have multiple remote entries
# to load balance between the servers.
remote {เลข IP ของ server หรือชื่อ public domain ที่เราใช้ที}
;remote my-server-2 1194

# SSL/TLS parms.
# See the server config file for more
# description.  It's best to use
# a separate .crt/.key file pair
# for each client.  A single ca
# file can be used for all clients.
ca {cer ที่เรา download มา ในที่นี้ชื่อ CAT6M.pem}
;cert client.crt
;key client.key

# Verify server certificate by checking that the
# certicate has the correct key usage set.
# This is an important precaution to protect against
# a potential attack discussed here:
#  http://openvpn.net/howto.html#mitm
#
# To use this feature, you will need to generate
# your server certificates with the keyUsage set to
#   digitalSignature, keyEncipherment
# and the extendedKeyUsage to
#   serverAuth
# EasyRSA can do this for you.
;remote-cert-tls server

# Select a cryptographic cipher.
# If the cipher option is used on the server
# then you must also specify it here.
# Note that 2.4 client/server will automatically
# negotiate AES-256-GCM in TLS mode.
# See also the ncp-cipher option in the manpage
;cipher AES-256-CBC


# Enable compression on the VPN link.
# Don't enable this unless it is also
# enabled in the server config file.
#comp-lzo

# Set log file verbosity.
;verb 3

# Silence repeating messages
;mute 20

auth-user-pass
comp-lzo
หรือให้สะดวกกว่านั้น ก็ copy ชุดนี้ไปแก้ไขเลย
client
dev tap
proto udp
remote {เลข IP ของ server หรือชื่อ public domain ที่เราใช้ที}
resolv-retry infinite
nobind
persist-key
persist-tun
ca {cer ที่เรา download มา ในที่นี้ชื่อ CAT6M.pem}
auth-user-pass
comp-lzo
จากนั้น save ไว้ที่ %PROGRAMFILES%\OpenVPN\config พร้อมกับไฟล์ Certificate ที่โหลดมาตั้งแต่แรก ดังภาพ

จากนั้นเปิด OpenVPN GUI ขึ้นมา แล้ว double click หรือ คลิกขวา connect ก็ได้ จากนั้นกรอก username, password ที่ได้สร้างไว้

ถ้าใช้งานได้จะขึ้นแบบนี้ก็ลองเข้าใช้งานระบบ Local Network ได้เลย

จบแต่เพียงเท่านี้ มีอะไรเดี๋ยวค่อยมาเพิ่มเติม